есть в наличии
Доставка:
- предоплата: от 25 грн
- оплата при : от 45 грн
получении
по России Почтой России
- На камере можно установить максимальную диафрагму объектива начиная от F/1.1 до F/45.
- Можно установить фокусное расстояние объектива от 1 мм и до 65535 мм.
- Возможно микрорегулирование фокусировки объектива от 0 до 31 шага.
- Когда питание отключается, настройки данных сохраняются в чипе одуванчика EMF.
- EMF адаптер М42-Canon позволяет камере подтверждать фокусировку звуковым сигналом и световой индикацией в видоискателе .
- Поддерживает приоритет диафрагмы (AV) и ручной режим (М).
- Данные о величине диафрагмы и фокусном расстоянии объектива записываются в EXIF.
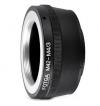
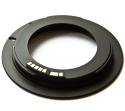
Переходник М42 - Canon EOS EF с програмируемым одуванчиком EMF является дальнейшим развитием популярного переходника одуванчик и служит для установки резьбовых объективов М42 на камеры Canon EOS с возможнотью изменения видимых камерой и записываемых в EXIF снимка параметров фокусного расстояния и установленной диафрагмы объектива. Переходник M42-EOS изготовлен из анодированного алюминия, с нижним фланцем и штифтовым упором для толкателя прыгающей диафрагмы объектива М42. Программируемый одуванчик также имеет возможность микроюстировки точности фокуса, которая работает аналогично системе встроенной в некоторые камеры Canon. Вводя поправки можно скорректировать подтверждение камерой фокуса в необходимую вам сторону.
Переходник М42-Canon EOS EF с программируемым одуванчиком позволяет установить на камеры Canon EOS объективы Зенит, Carl Zeiss Jena, Pentacon, Pentax и др. с резьбовым креплением М42 .
|
Инструкция на английском
|
EMF chip Smart Adapter User’s Manual
Main Features
1. Lens’ maximum aperture can be set on camera, ranging from F/1.1 to F/45
2. Lens’ focal length can be set on camera, ranging from 1mm to 65535mm
3. Focus micro-adjustment of the lens can be set on camera.
4. Setting data is stored in the chip on the ring when powered off.
5. The ring enables camera viewfinder focus confirmation light and confirmation sound.
6. Supports AV (Aperture Priority) and Manual Mode.
7.Exposure aperture data can be recorded in EXIF.
Shooting with Smart Adapter
Shooting and Recording exposure aperture data
Notice: please set up the adapter before use.
[See the How to Setup the Adapter section]
You can:
1. Set the maximum aperture on lens
2. Set the desired aperture on camera
3. Focus and meter the object, when focus is achieved.
4. Set the lens aperture to the same desired aperture as the camera setting
5. Press shutter button and take the picture.
And you can also:
1. Set the maximum aperture on lens
2. Set the aperture value on camera to maximum lens aperture
3. Focus and meter the object, when focus is achieved.
4. Set the lens aperture AND the camera aperture setting to the desired aperture.
5. Press shutter button and take the picture
Shooting and not recording exposure aperture setting
1. Set the aperture value on camera to the lens’ maximum aperture
2. Set the camera to AV mode
3. Set the desired aperture on lens
4. Focus and meter the object and take the picture.,
Exposure aperture data recorded in EXIF is the lens’ maximum aperture.
How to Setting Up the emf chip Smart Adapter
1. Attach the adapter to the lens and attach the lens to the camera when camera is powered off. Power on the camera and set the camera to Manual mode. Set the camera in single shoot drive mode. Set the shutter speed to 1/60 second and aperture increment step to 1/3 EV.
Notice: Do not set the camera in continuous shooting mode to avoid misopertations.
2. Turn the aperture setting dial and set the aperture value to F/64 and press shutter button once.
3. Turn the aperture dial and set the aperture value to F/57 and press shutter button once.
4. Turn the aperture dial and set the aperture value to F/64 and press shutter button once. The operation combination of F/64-shutter button+F57-shutter button +F/64-shutter button will activate the setting mode of the ring.
5. Turn the aperture dial, if the maximum aperture value can be set to F/1.0, your ring is now in setting mode. And you can begin to set the focal length, maximum aperture value and focus micro adjustment of your lens.
How to enter values in setting mode
1. When setting up the ring, you will need to enter some values. In setting mode, the ring interprets specified aperture values to numbers. The conversion rule is stated in the beneath chart:
|
F/2.0 |
F/2.2 |
F/2.5 |
F/2.8 |
F/3.2 |
F/3.5 |
F/4.0 |
F/4.5 |
F/5.0 |
F/5.6 |
|
0 |
1 |
2 |
3 |
4 |
5 |
6 |
7 |
8 |
9 |
The ring has THREE setting modes:
Mode 0- enter lens’ maximum aperture.
Mode 1- enter lens’ focal length.
Mode 2- enter lens’ focus micro adjustment.
Turn the aperture dial to specific aperture value and press shutter button to enter a desired setting mode.
For example, if you want to enter the lens’ maximum aperture, turn the aperture dial to F/2.0[which means Number 0 to the ring] and press shutter button. You are setting the ring in maximum aperture enter mode.
Enter the maximum aperture
1. Turn the dial and set the aperture to F/2.0 and press shutter button to enter this mode.
2. Turn the dial and set the aperture to the actual maximum aperture of your lens and press shutter button. The maximum aperture will be registered in the ring.
The ring accepts aperture value ranging from F/1.1 to F/45.
Notice:
Do not set the maximum to F/1.0. This value is reserved for engineering purpose and will not be accepted by the ring.
Do not set the maximum aperture smaller than F/5.6. The focus detecting system of your digital camera might fail to function properly when a lens slower than F/5.6 is attached.
Goto Store the parameters to emf chip
Enter the focal length
1. Turn the dial and set the aperture to F/2.2 and press shutter button to enter this mode.
2. Focal length can be set from 1mm to 65535mm. The ring needs five numbers to store the focal length data. If the focal length of your lens is smaller than five digits, you need to insert zeros in front of actual numbers. Each time you choose a number, press shutter button to enter.
Goto Store the parameters to emf chip
For example, if the focal length of your lens is 50mm, you shall enter 00050, that will be a combination of operations: F/2.0-shutter + F/2.0-shutter + F/2.0-shutter + F/3.5-shutter + F/2.0-shutter
Enter focus micro adjustment
1. Turn the dial and set the aperture to F/2.5 and press shutter button to enter this mode.
emf chip accepts focus micro adjustment value, ranging from 0 to 31. The value is defined by two numbers. If the micro adjustment value of your lens is smaller than two numbers, you shall insert a zero in front of the actual number. Choose the desired number and press shutter button to enter the value one by one.
Goto Store the parameters to emf chip
For example, if the micro adjustment value is 25, you shall enter F/2.5 - shutter button + F/3.5 – shutter button
Notice: Please enter the micro adjustment value according to your own tests. The value shall not be entered based on calculation alone.
Store the parameters to emf chip
When you finish entering all the parameters of your lens, you shall store them in the ring for normal shooting. Here is how:
Change the aperture value to F/57, press shutter button once.
Change the aperture value to F/64, press shutter button once.
Change the aperture value to F/57 again, press shutter once.
If all the values you’ve entered are correct, the above three steps will store all the parameters you’ve just entered to the chip on emf chip.
If you have miss some steps in the entering process or the value you’ve entered does not fit the value range requirement stated above, the ring will automatically exit setting up mode and no parameters will be stored in the ring.
All the data stored in emf chip will not lost when camera is powered off.
The default parameter settings of emf chip is 50mm F/1.4, please change the parameters according to your lens’ specifications.
Caution:
1. Do not touch the golden contact points of the circuit board of emf chip when attaching and detaching the ring to your lens and camera.
2. Do not use F/64-shutter + F/57- shutter + F/64 – shutter combination in normal shootings.quot;fontSize4\
7. Данные относительно светового отверстия записываются в формате EXIF.




Китай
Отзывы могут добавлять только зарегистированные пользователи